
Materials you will need: a durable rope, an old tire, drill, a strong tree limb, and don't forget your camera!!
Materials you may end up using when it's all said and done: a ladder, an old sock, rocks, golf balls, duct tape, weak twine string, scissors, a metal rake, your wife, a can of Sprite,
a can of spray paint, a small table and a flash light. (Try hanging a tire swing and you'll see just what I'm talking about)

Step 1: Do not tell your kid you are planning to hang a tire swing!
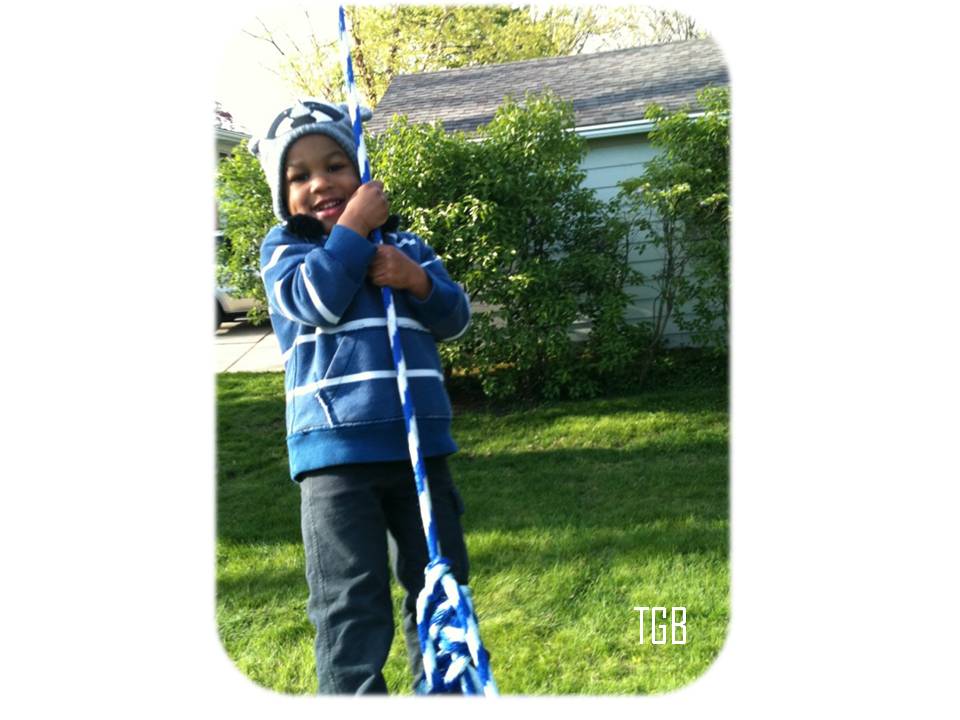
**With older kids this may not be such an issue, but if they are anything like our 3 year old, Harrison, they will bug you about "my new tire swing" every 12 minutes of every day before the thing is even hung! (so shhhhh...keep it a secret until you are for sure you have the time to
hang it THAT DAY!!)
Step 2: Ride around surrounding neighborhoods with high hopes of randomly spotting one lonely tire that may have been kicked to the curb. Or just go to your local tire dealer, like I did, to see if they have a tire they will let you take off of their hands. One less tire in the landfill!!
Step 3: Drill a good size hole into what will be the bottom of the tire for water drainage.
**You want to do this so you don't have a collection of water which can become a mating ground for mosquitoes after it rains. Your skin will appreciate it.
Step 4: Start to clean the tire.

Step 5: Cleaning the tire will take some time, so prepare, dry it off and spray paint it right away!
Step 6: Let it dry.
**This is a very important step. By this time even YOU may be eager to get this thing swinging, but give yourself at least a couple of hours before you really handle the tire. In the mean time, take some funny pics of your anxious kid.


Step 9: Concoct and attach some kind of weight to the end of your rope.

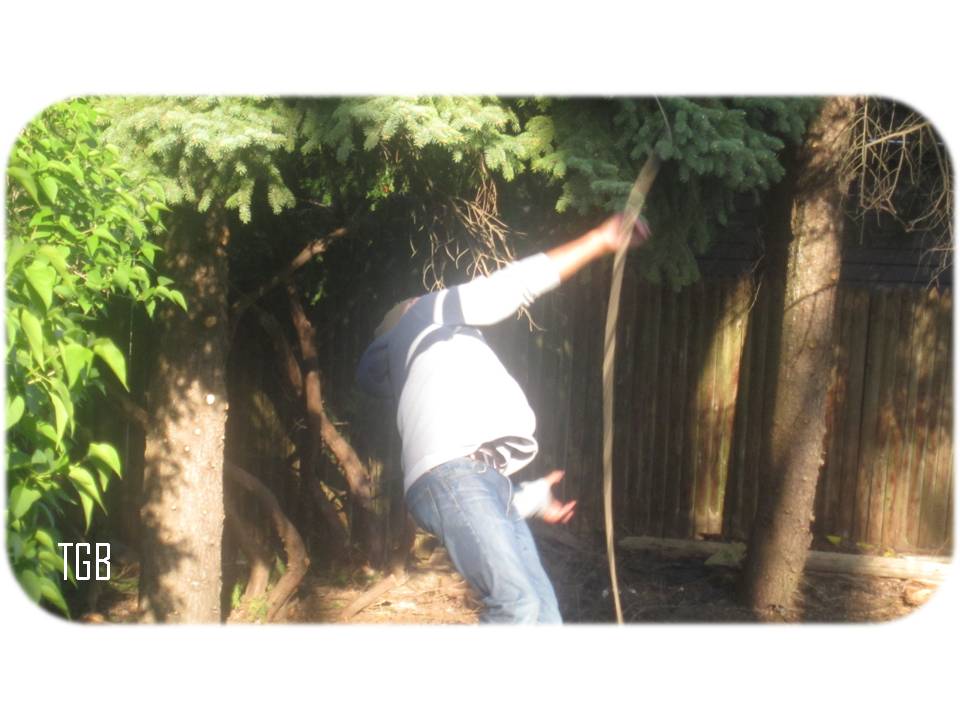
Step 10: Heave the weighted rope in the air with hopes of it clearing the tree branch.
Step 11: Repeat Step 10 over, and over, and over again.. This step also includes yelling at your kids to "watch out!" of the falling weight.


to secure your rope.
**We used a bowline knot. Much easier in my opinion.


Step 13: Go get that tire and wrap the free end of the rope around it as fast as you can!!
**This is when you find out just how heavy tires are. Call for someone to help as there needs to be a secure knot on the tire as well. There is no way you can hold the tire and tie a secure, even knot at the same time. Very important!!
Now for the moment of truth! The moment you've all been waiting for! (Applause! Applause! Applause!) Drum roll please.....
Put the kid on that swing and let 'em fly!!
****Parents obviously you're going to test the swing out before you put the little ones on it.. right?? I mean, it's the safest way to test it out. Give it a few swings, then give them a turn. When you remember how much fun it used to be, and still is, get back on it after they're in bed.

Tell me something better than summer fun and making your kids smile :)

No comments:
Post a Comment
We highly value your opinions, so tell us what you think about what you've seen. In doing so, try to be nice about it. We're just having fun, loving each other and sharing it with you!!